Few things are more satisfying than baking a rustic loaf of Ciabatta bread at home — the aroma, the texture, and the first crunchy bite of that golden crust.
Ciabatta, an Italian bread known for its crisp exterior and soft, open crumb, has become a favorite among bread lovers around the world. The name “ciabatta” literally means “slipper” in Italian, a nod to its broad, flat shape.
This classic loaf is perfect for making sandwiches, dipping into olive oil, or enjoying simply with butter. While it takes patience, every step — from the long fermentation to the final bake — pays off with a bread that’s beautifully rustic, flavorful, and delightfully chewy.
A Brief History of Ciabatta
Ciabatta was born in Lombardy, Italy, during the early 1980s as an Italian response to the French baguette craze. Italian bakers wanted to create a bread that was equally crusty and aromatic yet distinctly Italian in taste and texture.
The result was ciabatta, a bread celebrated for its porous crumb, chewy interior, and authentic simplicity — a testament to Italian craftsmanship in baking.
🥖 What Makes Ciabatta Special
The secret to ciabatta’s texture lies in its high-hydration dough — a dough that contains a large proportion of water. This wet dough creates the signature open holes and chewy consistency that define a perfect ciabatta loaf.
Working with such a sticky dough requires gentle folding instead of kneading, patience, and careful fermentation. The use of a pre-ferment (biga) deepens the flavor and enhances the bread’s structure, resulting in an artisan-quality loaf that rivals any bakery.
🧂 Ingredients
For One Batch (2 Loaves):
- 500 g (4 cups) all-purpose flour
- 10 g (2 tsp) salt
- 5 g (1 tsp) active dry yeast
- 400 ml (1 ⅔ cups) water, at room temperature
- 10 g (2 tsp) olive oil
- Additional flour, for dusting
For the Pre-Ferment (Biga):
- 100 g (¾ cup) flour
- 100 ml (½ cup) water
- A pinch of yeast
👩🍳 Step-by-Step Instructions
1. Prepare the Biga (Pre-Ferment)
In a small bowl, combine 100 g flour, 100 ml water, and a pinch of yeast.
Stir until a shaggy dough forms. Cover the bowl tightly with plastic wrap and let it ferment at room temperature for 12–16 hours (overnight). The biga should look bubbly and smell slightly sweet and yeasty.
2. Mix the Dough
The next day, in a large mixing bowl, combine the remaining flour, salt, yeast, and the prepared biga.
Gradually pour in the remaining water, stirring until you get a wet, sticky dough — it should feel loose and highly hydrated.
Do not add extra flour.
3. Autolyse (Rest the Dough)
Cover the bowl with plastic wrap and let the dough rest for 30 minutes.
This resting phase allows the flour to fully hydrate and starts gluten development naturally.
4. Incorporate Olive Oil
Add olive oil to the dough and gently fold it in using your hands or a dough scraper.
Fold the dough over itself a few times — this strengthens the gluten network without deflating the air pockets.
5. Bulk Fermentation with Stretch & Folds
Cover the dough again and let it rise at room temperature for 3 hours.
During this period, perform three sets of stretch-and-folds, spaced 30 minutes apart:
- Gently stretch the dough from one side and fold it toward the center.
- Rotate the bowl and repeat on all four sides.
By the third set, the dough should be smooth, elastic, and airy.
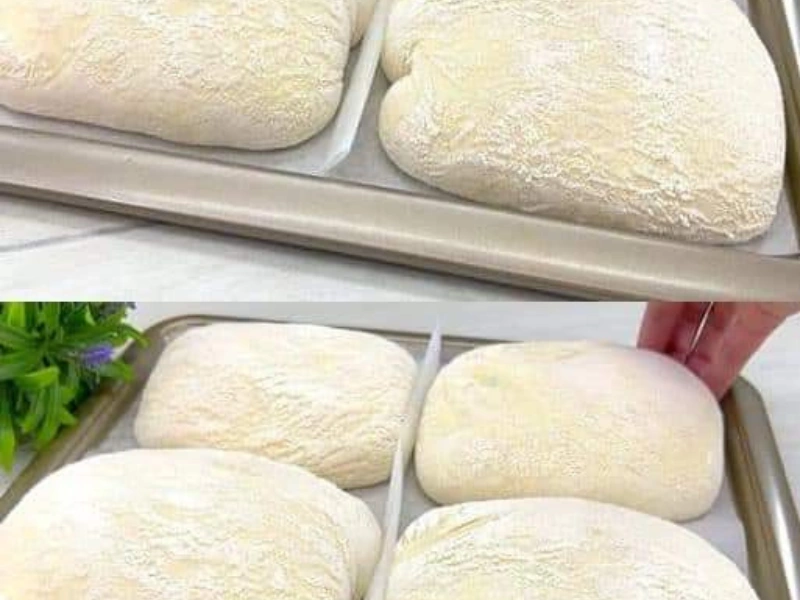
6. Shape the Loaves
Generously flour your work surface and turn the dough out gently.
Divide into two equal pieces and shape each into a rough rectangle.
Handle delicately to preserve air bubbles — resist the urge to knead or roll.
Place each loaf on parchment paper dusted with flour. Cover with a clean kitchen towel and let rest for 30–45 minutes.
7. Bake the Ciabatta
Preheat your oven to 475°F (245°C). Place a baking stone or inverted sheet pan inside and a shallow pan of water on the bottom rack to create steam.
Slide the parchment with the loaves onto the hot surface. Bake for 20–25 minutes, until golden brown and the crust sounds hollow when tapped underneath.
8. Cool and Serve
Transfer the baked loaves to a wire rack and cool completely before slicing.
Cutting into hot ciabatta too early can make the crumb gummy — patience pays off here!
💡 Tips for Perfect Ciabatta
- Ferment fully: Let the biga rise for the full 12–16 hours to develop depth of flavor.
- Keep it wet: A sticky dough means open crumb — avoid over-flouring.
- Use steam: The pan of water in the oven ensures a crisp, golden crust.
- Handle gently: Stretch and fold, don’t knead. Over-handling deflates the dough.
- Cool completely: Always let the bread rest before slicing.
- Experiment: Try substituting part of the flour with bread flour or whole wheat for a heartier loaf.
🥐 Serving & Storage
Enjoy ciabatta fresh from the oven or use it as a base for:
- Italian panini sandwiches 🥪
- Dipping into olive oil and balsamic vinegar 🫒
- Serving with soups, stews, or salads 🍲
To store: Keep at room temperature in an airtight container for up to 2 days, or freeze for up to 3 months. Reheat briefly in the oven to restore crispness.
❤️ Conclusion
Ciabatta is more than just bread — it’s a work of Italian art. With its crispy crust, airy crumb, and deep, developed flavor, it showcases the beauty of patience and simplicity in baking.
Whether you’re an experienced baker or just starting out, making ciabatta at home is a truly rewarding experience. From the first mix to the final golden loaf, every step brings you closer to the joy of artisan bread baking.
So gather your ingredients, trust the process, and enjoy the satisfaction of your own homemade ciabatta — rustic, beautiful, and irresistibly delicious.