
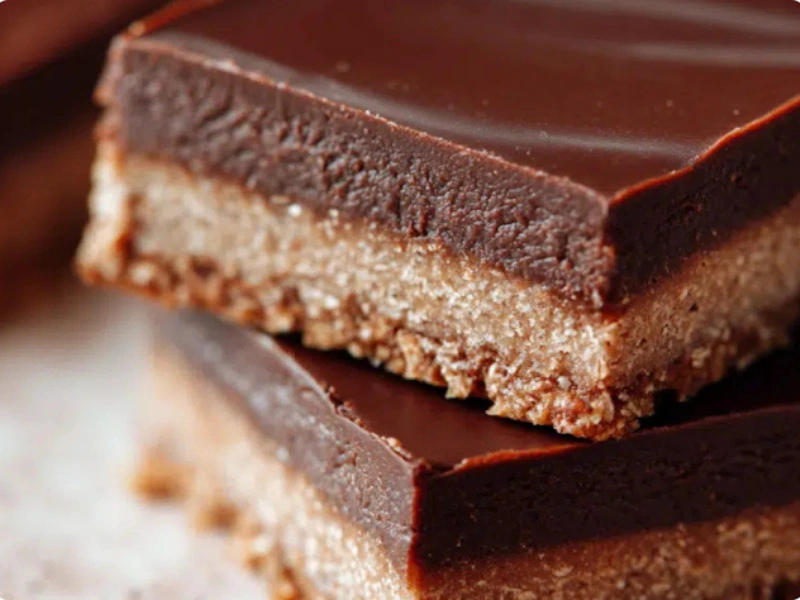
If you’ve ever tasted an Australian chocolate slice—sometimes called chocolate crackle or fridge cake—you already know the danger: it vanishes fast. One minute it’s chilling in the fridge, the next someone’s asking for “just one more piece.”
This beloved no-bake classic layers a crisp cocoa biscuit base, a rich fudgy condensed milk filling, and a glossy chocolate topping. It comes together with one saucepan, minimal effort, and zero oven time, yet delivers maximum nostalgia and crowd-pleasing comfort. Perfect for bake sales, lunchboxes, parties, or late-night cravings, this slice is a true Aussie staple—and once you try it, you’ll see why.
Why You’ll Love This Recipe
- No oven required—set in the fridge
- Just 9 simple pantry ingredients
- Naturally nut-free (unless you add them)
- Kid-friendly and easy to make together
- Keeps well for days—if it lasts that long
Ingredients
Biscuit Base
- 1 cup (100 g) plain sweet biscuits, finely crushed (Marie biscuits or graham crackers)
- ⅓ cup (75 g) unsalted butter, melted
- 2 tablespoons unsweetened cocoa powder
Chocolate Filling
- 1 cup (180 g) sweetened condensed milk
- 1 tablespoon unsalted butter
- 2 tablespoons golden syrup (or light corn syrup)
- 1 cup (175 g) semi-sweet chocolate chips
- 1 teaspoon vanilla extract
Topping
- ½ cup (90 g) chocolate chips
- 1 teaspoon vegetable oil (optional, for a smoother finish)
- Sprinkles or chopped nuts (optional)
Note: Golden syrup gives the slice its classic Australian flavor, but corn syrup works well if needed.
How to Make Australian Chocolate Slice
Step 1: Prepare the Pan
Line an 8 × 8 inch (20 × 20 cm) square pan with parchment paper, leaving overhang on two sides for easy removal. Lightly grease if needed.
Step 2: Make the Biscuit Base
In a mixing bowl, combine the crushed biscuits, melted butter, and cocoa powder. Stir until the mixture resembles damp sand.
Press firmly and evenly into the base of the prepared pan using the back of a spoon or a flat measuring cup. Chill in the refrigerator while you prepare the filling.
Step 3: Make the Chocolate Filling
In a small saucepan over low heat, combine the chocolate chips, butter, and golden syrup. Stir constantly until melted, smooth, and glossy—about 3 to 4 minutes.
Remove from heat and stir in the sweetened condensed milk and vanilla extract until fully combined and silky.
Step 4: Assemble
Pour the warm chocolate filling over the chilled base and spread evenly with a spatula. Return the pan to the fridge for 10–15 minutes, just until the filling begins to set slightly.
Step 5: Add the Topping
Melt the topping chocolate chips and oil (if using) in a microwave-safe bowl in 30-second bursts, stirring until smooth.
Pour over the filling and spread gently to the edges. Immediately add sprinkles or nuts if using—they’ll adhere best while the chocolate is still soft.
Step 6: Chill and Slice
Refrigerate for at least 2 hours, or until fully firm. Lift out using the parchment overhang and cut into 16 squares with a sharp knife, wiping the blade between cuts for clean edges.
Serve chilled or at room temperature.
Serving Ideas
- Classic: Cut into small squares for afternoon tea
- Festive: Add seasonal sprinkles for birthdays or holidays
- Gourmet: Swirl peanut butter or caramel into the filling
- On-the-go: Ideal for lunchboxes—it holds its shape beautifully
Frequently Asked Questions
Can I use dark chocolate?
Yes. Use 70% dark chocolate for a richer, less sweet slice.
Is this gluten-free?
Yes, if you use certified gluten-free biscuits.
Can I freeze it?
Absolutely. Freeze in a single layer, then store for up to 2 months.
Why did my filling turn grainy?
The heat was too high. Always melt chocolate gently over low heat.
Allergy & Dietary Notes
- Contains: Dairy, wheat (from biscuits)
- Nut-free: Yes (unless nuts are added)
- Vegetarian: Yes
Always double-check labels if cooking for allergies.
Final Thoughts
This Australian Chocolate Slice is more than a dessert—it’s pure nostalgia in square form. Rich, chocolatey, and effortlessly simple, it proves that the best sweets don’t need an oven or fancy techniques. Just a saucepan, a fridge, and a little patience.
Slice it up, share it generously, and don’t be surprised when it becomes a repeat request. 🍫🇦🇺