A classic bakery-style dessert made simple
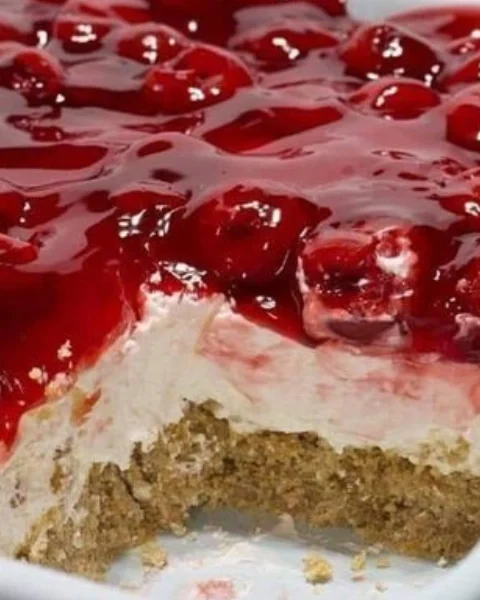
There’s something timeless about cherry cheesecake. The contrast of silky cream cheese, a buttery graham cracker crust, and that glossy ruby-red topping feels nostalgic and indulgent all at once.
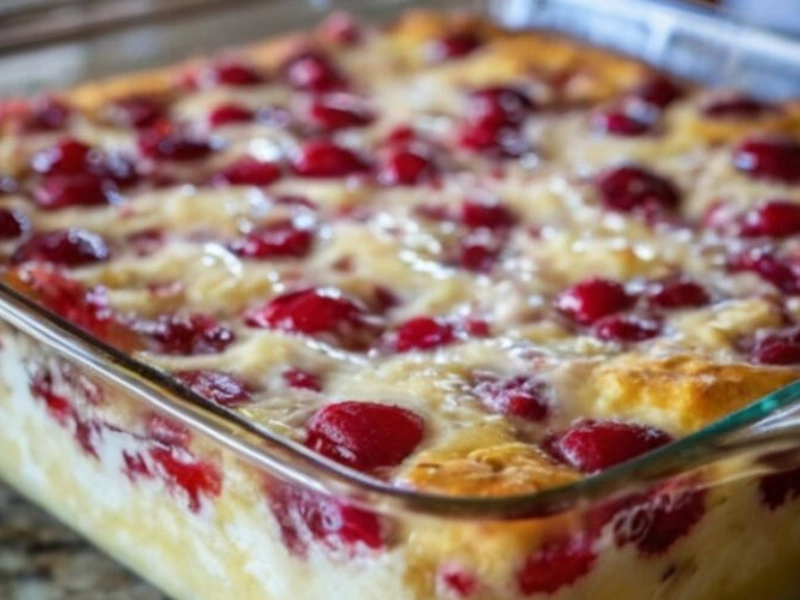
These Cherry Cheesecake Bars deliver everything people love about traditional cheesecake—without the stress. No water bath. No springform pan. No cracking anxiety.
Instead, you get thick, creamy cheesecake baked on a golden crust, finished with sweet-tart cherries and sliced into neat, shareable bars. They’re the kind of dessert that vanishes quickly at gatherings… and quietly calls your name from the fridge later that night.
Why You’ll Love This Recipe
- Easier than classic cheesecake—no special pans or techniques
- Ultra-smooth, creamy texture with clean slices
- Perfect balance of rich cheesecake and bright cherry flavor
- Ideal make-ahead dessert for holidays and potlucks
- Freezer-friendly and great for planning ahead
Ingredients
Graham Cracker Crust
- 1½ cups graham cracker crumbs
- ¼ cup granulated sugar
- ½ cup unsalted butter, melted
Cheesecake Layer
- 16 oz (2 blocks) cream cheese, softened
- ½ cup granulated sugar
- 2 large eggs, room temperature
- 1 teaspoon vanilla extract
Topping
- 1 (21 oz) can cherry pie filling
Equipment Needed
- 9×13-inch baking pan
- Parchment paper or nonstick spray
- Mixing bowls
- Hand mixer or stand mixer
- Rubber spatula
- Measuring cups and spoons
- Sharp knife for slicing
Step-by-Step Instructions
1. Prepare the Crust
Preheat oven to 325°F (165°C). Line a 9×13-inch pan with parchment paper, leaving overhang for easy removal.
In a bowl, mix graham cracker crumbs, sugar, and melted butter until evenly moistened. Press firmly into the bottom of the pan.
Bake for 10 minutes, then remove and let cool slightly.
2. Make the Cheesecake Filling
In a large bowl, beat softened cream cheese until completely smooth and lump-free.
Add sugar and mix until incorporated. Beat in eggs one at a time, then add vanilla. Mix just until smooth—avoid overbeating.
3. Assemble the Bars
Pour the cheesecake filling over the warm crust and spread evenly.
Spoon cherry pie filling over the top and gently spread to the edges without swirling.
4. Bake
Bake for 35–40 minutes, until the center is set and no longer wobbly when gently shaken.
Remove from oven and cool completely at room temperature.
5. Chill and Slice
Refrigerate for at least 3 hours (overnight is best). Once fully chilled, lift out using parchment and slice into bars with a clean, sharp knife.
Pro Tips
- Room-temperature cream cheese ensures a silky filling
- Stop mixing once eggs are added to prevent excess air
- Chill thoroughly for sharp, professional slices
- Wipe the knife between cuts for clean edges
- Add 1 teaspoon lemon zest for extra brightness
Variations & Substitutions
- Swap cherry topping for blueberry, strawberry, or raspberry
- Use an Oreo crust instead of graham crackers
- Drizzle with melted chocolate before serving
- Make gluten-free with GF graham crackers
- Add ¼ teaspoon almond extract for bakery-style depth
Serving, Pairing & Storage
Serving
- Best served chilled or slightly cool
- Optional garnish: whipped cream or shaved chocolate
Pairs Well With
- Coffee or espresso
- Hot tea
- Fresh berries
Storage
- Refrigerate in an airtight container up to 5 days
Freezing
- Freeze sliced bars up to 2 months
- Thaw overnight in the refrigerator
Frequently Asked Questions
Can I make these ahead of time?
Yes—these bars are best made the day before serving.
Why did my cheesecake crack?
Overmixing or overbaking can cause cracks, but the cherry topping covers everything beautifully.
Can I halve the recipe?
Yes. Use an 8×8-inch pan and reduce bake time by 5–7 minutes.
Can I use homemade cherry topping?
Absolutely—just make sure it’s thick and fully cooled.
Do these need refrigeration?
Yes. Cream cheese desserts should always be kept chilled.