Ice cream has an enduring charm, but crafting a truly indulgent version at home is far easier than most people expect. This no-churn chocolate truffle ice cream eliminates the need for specialized equipment, relying instead on a simple yet effective method that delivers an exceptionally rich and creamy texture.
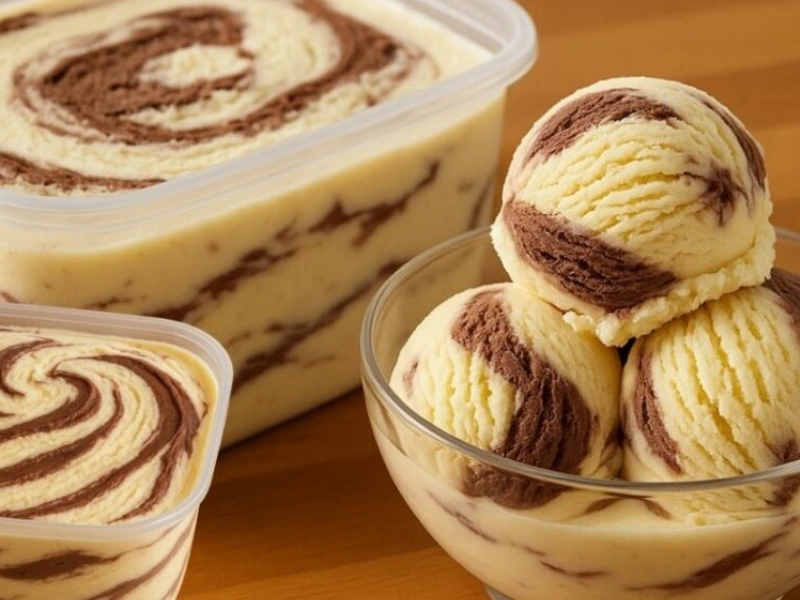
The magic lies in a velvety base of sweetened condensed milk and heavy cream, enhanced with powdered milk for extra body. Swirled throughout is a ribbon of homemade chocolate truffle ganache—deep, glossy, and intensely flavorful. The result is a refined dessert that combines the smooth comfort of premium vanilla ice cream with the luxurious depth of chocolate truffles.
Perfect for special occasions or elevating an ordinary day, this marbled masterpiece proves that impressive desserts don’t have to be complicated. With minimal effort, you can create an ice cream that rivals high-end artisanal versions—right in your own kitchen.
Ingredients
For the Ice Cream Base
- Sweetened condensed milk: 2 cans (about 800 g / 28 oz)
- Heavy cream: 2 cartons (400 g / 14 oz), very cold
- Powdered milk: 1 cup (100 g / 3.5 oz)
- Vanilla extract: 1 tablespoon
For the Chocolate Truffle Ganache
- Semi-sweet or milk chocolate: 200 g (7 oz)
- Heavy cream: ½ carton (100 g / 3.5 oz)
Instructions
1. Prepare the Ice Cream Base
Combine the sweetened condensed milk, heavy cream, powdered milk, and vanilla extract in a blender. Blend until the mixture is completely smooth, thick, and uniform.
Pour the mixture into a shallow, freezer-safe container with a lid. Place it in the freezer for 2 hours, until partially set.
2. Make the Chocolate Truffle Ganache
While the base chills, prepare the ganache. Gently melt the chocolate using a double boiler or microwave in 30-second intervals, stirring well between each round.
Once smooth, add the heavy cream and stir vigorously until the ganache becomes glossy and fully combined. Set aside to cool until thick yet pourable.
3. Assemble and Swirl
After two hours, remove the ice cream base from the freezer. Stir thoroughly to break up any early ice crystals.
Drizzle or spoon the cooled ganache over the surface. Using a spoon or knife, gently fold and swirl the ganache into the base just a few times, creating a marbled pattern. Avoid overmixing to preserve distinct ribbons.
4. Freeze Until Set
Cover the container tightly and return it to the freezer for at least 4 hours, or until completely firm. Serve well chilled.
Variations
This recipe is wonderfully adaptable:
- Crunchy Add-Ins: Fold in chopped toasted nuts, crushed cookies, or brittle for texture
- Fruit Swirls: Replace or complement the ganache with raspberry or strawberry sauce
- Caramel Touch: Add a salted caramel ribbon for a sweet-savory contrast
- Chocolate Choices: Use dark chocolate for a bold, bittersweet swirl or white chocolate for a sweeter, creamier note
- Infused Ganache: Flavor the ganache by warming the cream with orange zest, mint, or a pinch of espresso powder
- Base Flavor Twists: Swap vanilla for almond, coconut, or maple extract
- Vanilla Bean Upgrade: Add scraped vanilla bean seeds for deeper flavor
- Malted Version: Substitute powdered milk with malted milk powder for a nostalgic malt profile
Expert Tips for Perfect Results
- Start with very cold heavy cream to help stabilize the mixture
- Blend until smooth, but avoid over-blending, which can begin turning cream into butter
- Let the ganache cool to a pudding-like consistency before swirling
- If the ganache thickens too much, gently rewarm it for a few seconds
- Stir the base at the 2-hour mark to break up ice crystals—repeat once more if time allows
- Use a wide, shallow container for faster, more even freezing
Storage and Serving
- Store the ice cream in an airtight, freezer-safe container
- Press parchment or wax paper directly onto the surface before sealing to prevent ice crystals
- Keep frozen for up to 2–3 weeks for best texture and flavor
- Let sit at room temperature for 5–10 minutes before scooping
- Always use a clean, dry scoop and return the container to the freezer promptly
- Avoid repeated thawing and refreezing, which causes ice crystal formation
Conclusion
This no-churn chocolate truffle ice cream showcases how a handful of simple ingredients, thoughtfully combined, can produce a dessert of remarkable elegance. With no special equipment and minimal effort, you achieve a creamy, visually stunning ice cream layered with deep chocolate richness.
Each scoop reveals a unique swirl of ganache, making every serving feel special. Whether prepared for guests or enjoyed quietly at home, this recipe invites you to indulge, create, and savor a dessert that truly feels extraordinary.