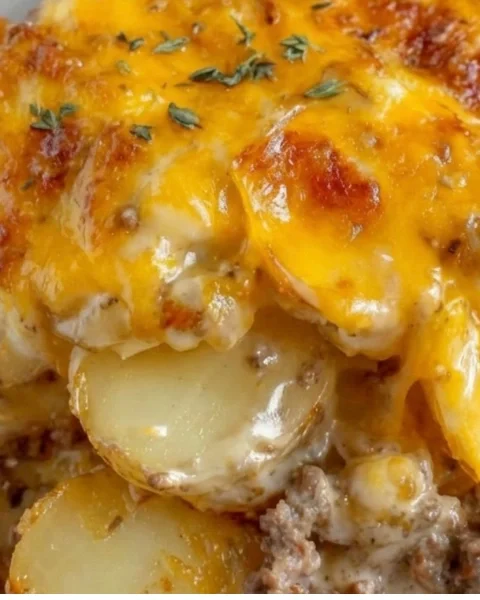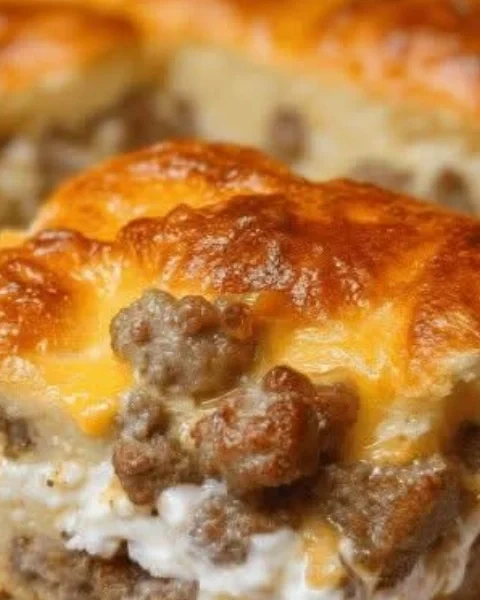

When I’m craving a dish that’s both comforting and a little gourmet, I always come back to my Stuffed Mashed Potato Nests. They’re crisp on the outside, creamy in the center, and loaded with savory beef and melted cheese. Of all my “humble ingredients turned elegant” recipes, this is the one guests request the most.
Why These Potato Nests Are Always My Go-To
This recipe transforms simple pantry staples into something beautiful enough for entertaining and easy enough for weeknights.
Here’s why they never fail:
- Easy to customize: Swap the beef for another protein or use veggies for a vegetarian option.
- Make-ahead friendly: The filling can be prepared the night before.
- Kid-friendly: They look fun and taste even better.
- Balanced flavor: Creamy, savory, herby, and cheesy.
- Great presentation: They hold their shape, making them perfect for serving.
If you love comfort food with creative twists, try pairing them with cheeseburger rollups or a hearty minced meat potato bake.
Step-by-Step Guide to Making Stuffed Mashed Potato Nests
Ingredients
For the Mashed Potato Nests
- 3–5 large potatoes
- 3.5 tbsp (50 g) unsalted butter
- Fresh dill, finely chopped
- Salt, smoked paprika, black pepper, oregano (to taste)
For the Filling
- 1.1 lbs (500 g) ground beef
- 1 medium onion, finely diced
- 2 garlic cloves, minced
- 1 red bell pepper, chopped
- 1 large tomato, diced
- 2.5 oz (70 g) tomato paste
- Fresh parsley, finely chopped
- 3.5 oz (100 g) mozzarella cheese, shredded
Instructions
1. Prepare the Potatoes
- Peel and cube the potatoes.
- Boil in salted water until fork-tender (15–20 minutes).
- Drain and let cool slightly.
2. Mash the Potatoes
- Add potatoes and butter to a large bowl.
- Mash until smooth and creamy.
- Stir in dill, smoked paprika, salt, pepper, and oregano.
- Adjust seasoning and set aside.
3. Cook the Beef Filling
- Heat a skillet over medium heat. Add ground beef and cook until browned.
- Add onion and garlic; sauté until soft and fragrant.
4. Add the Vegetables
- Add bell pepper and tomato. Cook 5 minutes until softened.
5. Add Tomato Paste and Parsley
- Stir in tomato paste until well combined.
- Turn off heat and mix in chopped parsley.
6. Form the Potato Nests
- Preheat oven to 375°F (190°C).
- Line a baking sheet with parchment paper.
- Spoon the mashed potatoes into rounds and press the centers to form wells.
7. Fill and Bake
- Spoon the beef mixture into each potato nest.
- Top with shredded mozzarella.
- Bake for 15 minutes, or until the cheese melts and bubbles.
8. Optional Crispy Finish
- For extra crispiness, broil for 2–3 minutes, watching closely.

My Experience With This Recipe
I first made these using leftovers—potatoes, beef, and a small block of cheese. I shaped the mashed potatoes on instinct and hoped for the best. When they came out golden and crisp, I knew I’d created a keeper.
Now I make them whenever I want to impress without stressing. A few tips from practice:
- Moisten your spoon when shaping the nests to prevent sticking.
- Don’t overfill the centers—too much filling can overflow.
- For perfect shapes, use a ring mold.
- Chill the mash briefly to make shaping easier.
- Use fresh herbs—they brighten the flavor beautifully.
You can even use leftover potato bake as the mash base. This recipe is perfect for remixing with what you already have.
Why These Go Viral on Social Media
Their look alone makes them irresistible—golden edges, colorful filling, bubbling cheese. Every time I film a fork breaking into one, it gets people begging for the recipe. For the best photos:
- Use natural daylight.
- Capture a cheese pull moment.
- Finish with a sprinkle of parsley for color.
These pair beautifully with cucumber salad or soft milk buns to soak up the juices.
Serving Ideas That Elevate the Dish
These nests are satisfying on their own, but they shine alongside:
- Fresh salads — especially cucumber salad with lemon dressing
- Soft breads — milk buns or naan
- Roasted vegetables — carrots, zucchini, cherry tomatoes
- Yogurt dips — a simple garlic yogurt mix is perfect
Serving a big batch on a wooden board with herbs and lemons makes them look instantly festive.
Creative Variations to Try
Once you learn the basic method, customize them your way:
- Chicken & spinach: Swap beef for shredded chicken and add sautéed spinach.
- Spicy version: Add chili flakes or harissa.
- Cheese-burst: Hide a small mozzarella cube in the center before adding filling.
- Vegetarian: Use mushrooms, zucchini, and corn.
- Mini nests: Make bite-sized versions for parties.
For more savory inspiration, try crab rangoon egg rolls or crispy lentil patties.
Frequently Asked Questions
Can I make them ahead of time?
Yes! Prepare the mash and filling a day in advance. Assemble just before baking.
What potatoes work best?
Russets or Yukon Golds—they mash well and hold their shape.
Can I freeze them?
Yes. Freeze after shaping and before baking. Thaw overnight, then bake.
What if I don’t eat beef?
Use chicken, turkey, or sautéed vegetables.
How do I make them crispier?
Brush the edges with olive oil and broil for 2–3 minutes.
Can I skip the cheese?
Yes, though cheese adds richness. If skipping, brush tops with a light egg wash for shine.
Is this kid-friendly?
Definitely! Kids can help mash the potatoes or add filling.
What pairs well with them?
Vegetable soup, fresh salads, yogurt dips, or roasted veggies.
How do I store leftovers?
Refrigerate in an airtight container for up to 3 days. Reheat in the oven or air fryer.
Can I use instant mashed potatoes?
You can, but homemade mash gives better flavor and structure.