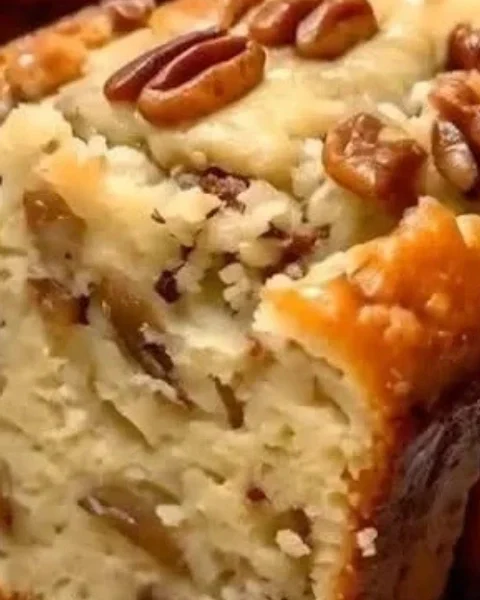
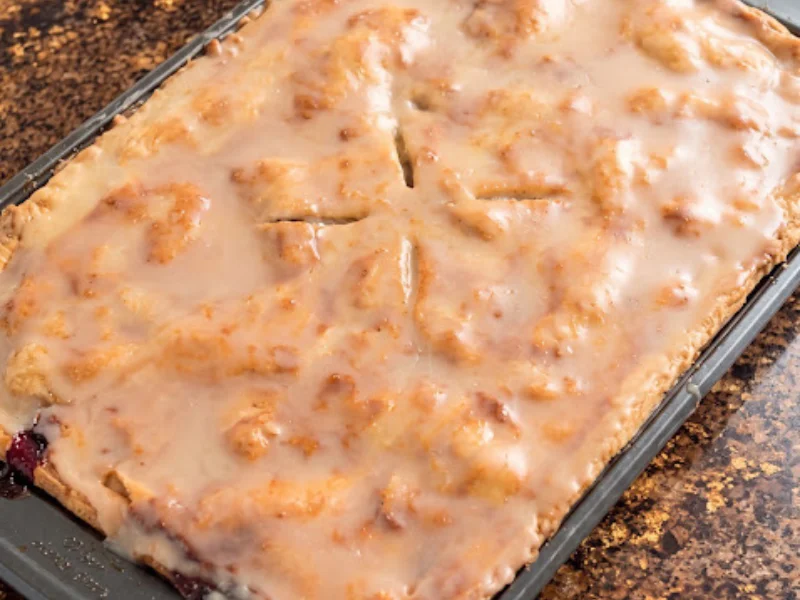
There’s nothing quite like the comforting taste of homemade apple pie. With its buttery, flaky crust, tender apples, and warm cinnamon filling, this classic dessert brings a little sweetness to any family gathering. But when you’re serving a crowd, a traditional round pie can disappear faster than you expect.
That’s where homemade apple slab pie comes in! Baked in a rectangular pan, this delicious dessert offers all the flavors of traditional apple pie in easy-to-cut squares. Every slice combines a golden crust with sweet, cinnamon-spiced apples for a treat that’s both beautiful and satisfying.
Apple slab pie is perfect for holiday dinners, potlucks, bake sales, family celebrations, and weekend desserts. Make your own pastry from scratch for an old-fashioned touch, or use refrigerated pie dough when you want to save time. Either way, this crowd-pleasing dessert is sure to become a favorite.
Why You’ll Love This Apple Slab Pie
Here are a few reasons this homemade apple dessert deserves a place on your baking list:
- Perfect for sharing. The rectangular shape makes it easy to cut into generous squares.
- Classic apple pie flavor. Sweet apples, cinnamon, and sugar create a familiar, comforting taste.
- Great for feeding a crowd. One large pan provides plenty of servings for family and friends.
- Easy to customize. Add pecans, cranberries, caramel, or a sweet glaze to make it your own.
- Make-ahead friendly. Bake it in advance and allow the filling to set before serving.
- Beautiful presentation. A golden crust and neatly cut squares look wonderful on any dessert table.
- Flexible preparation. Choose homemade pastry or refrigerated pie crusts, depending on your schedule.
The Ingredients
This apple slab pie uses simple baking ingredients to create a delicious homemade dessert. The recipe makes approximately 12–15 servings, depending on how large you cut the squares.
For the Pie Crust
- 3 cups all-purpose flour – Forms the base of the pastry.
- 1 teaspoon salt – Balances the flavor of the crust.
- 1 tablespoon granulated sugar – Adds a subtle touch of sweetness.
- 1 cup (2 sticks) cold unsalted butter, cubed – Creates a rich, flaky texture.
- 6–10 tablespoons ice water – Helps bring the pastry dough together.
Shortcut option: Use enough refrigerated pie dough to cover the bottom and top of a 10-by-15-inch rimmed baking sheet. Check the package quantities to ensure you have enough pastry.
For the Apple Filling
- 8 cups peeled, cored, and thinly sliced apples – Approximately 6–8 medium apples.
- ¾ cup granulated sugar – Sweetens the filling.
- ¼ cup packed brown sugar – Adds a deeper, caramel-like sweetness.
- 3 tablespoons all-purpose flour – Helps thicken the apple juices.
- 1½ teaspoons ground cinnamon – Provides the classic warm spice flavor.
- ¼ teaspoon ground nutmeg (optional) – Adds a subtle aromatic note.
- 1 tablespoon lemon juice – Brightens the apple flavor.
- 1 teaspoon vanilla extract – Adds warmth and sweetness.
- A pinch of salt – Balances the flavors.
For the Egg Wash
- 1 large egg – Helps the crust develop a beautiful golden finish.
- 1 tablespoon milk or water – Makes the egg wash easier to brush on.
- 1 tablespoon coarse sugar (optional) – Adds a little sparkle and crunch.
Step-by-Step Instructions
Step 1: Prepare the Pastry Dough
In a large mixing bowl, combine the flour, salt, and granulated sugar. Add the cold, cubed butter and work it into the flour using a pastry cutter or your fingertips.
Continue until the mixture resembles coarse crumbs, with a few pea-sized pieces of butter remaining.
Add the ice water one tablespoon at a time, mixing gently until the dough begins to hold together. You may not need all the water.
Divide the dough into two portions, making one slightly larger than the other. Shape each portion into a flat disk, wrap it, and refrigerate for at least 30 minutes.
Pro Tip: Keep the butter cold and avoid overworking the dough. Small pieces of butter help create a flaky crust when baked.
Step 2: Prepare the Apple Filling
Peel and core the apples, then slice them into fairly even pieces. Place the apples in a large bowl and toss them with the lemon juice.
Add the granulated sugar, brown sugar, flour, cinnamon, nutmeg if using, vanilla extract, and salt. Mix until the apple slices are evenly coated.
For the best texture, choose firm apples that hold their shape during baking. Granny Smith apples provide a pleasant tartness, while Honeycrisp and Braeburn apples offer a sweeter flavor. Combining tart and sweet varieties works especially well.
Pro Tip: Slice the apples evenly so they cook at a similar rate and produce a consistent filling.
Step 3: Roll Out the Bottom Crust
Preheat your oven to 375°F (190°C).
Lightly flour your work surface and roll out the larger portion of chilled dough into a rectangle large enough to cover the bottom and sides of a 10-by-15-inch rimmed baking sheet.
Carefully transfer the pastry to the pan and gently press it into the corners. Leave a little extra dough hanging over the edges so you can seal it with the top crust later.
Pro Tip: If the pastry becomes too soft or sticky while rolling, place it back in the refrigerator for a few minutes before continuing.
Step 4: Add the Apple Filling
Spread the prepared apple mixture evenly over the bottom crust. Arrange the slices across the pan so the filling is distributed as consistently as possible.
If the apples have released a lot of liquid while sitting in the bowl, avoid pouring all the excess liquid into the pastry. Too much moisture can make the bottom crust soggy.
Pro Tip: An even layer of apples helps the filling cook uniformly and makes the finished pie easier to slice.
Step 5: Add the Top Crust
Roll out the remaining dough into a rectangle large enough to cover the apple filling.
Carefully place it over the apples. Trim away any excess pastry, leaving enough around the edges to seal the top and bottom crusts together.
Pinch the edges firmly, then crimp them with your fingers or a fork.
Use a sharp knife to cut several small slits in the top crust. These openings allow steam to escape during baking and help prevent excess moisture from collecting inside the pie.
Pro Tip: For a decorative presentation, cut the top dough into strips and arrange them in a lattice pattern instead of covering the filling with one solid sheet.
Step 6: Brush and Finish the Crust
In a small bowl, whisk the egg with the milk or water until combined.
Brush a thin layer of egg wash over the top crust. If desired, sprinkle coarse sugar over the surface for a lightly crisp, sparkling finish.
Make sure the egg wash is spread evenly without allowing too much to pool around the edges.
Step 7: Bake Until Golden
Place the pan in the preheated oven and bake for approximately 40–55 minutes, or until the crust is golden brown and the apple filling is bubbling through the vents.
Baking time may vary depending on your oven, pan, and the thickness of the apple slices.
If the edges begin browning too quickly, cover those areas loosely with aluminum foil while the center finishes baking.
The apples should be tender when pierced with a small knife.
Pro Tip: Look for bubbling filling as well as a golden crust. These signs help indicate that the apples have cooked through.
Step 8: Cool Before Slicing
Remove the pie from the oven and place the pan on a cooling rack. Allow it to cool for at least 1½–2 hours before cutting.
This cooling period gives the filling time to thicken and settle, helping you cut neat squares without the apples sliding out.
Serve the pie at room temperature, or gently warm individual portions before serving.
Pro Tip: Don’t rush this step! Cutting the pie while it’s still very hot can cause the filling to run and make the squares difficult to lift.
How to Serve Apple Slab Pie Like a Pro
Apple slab pie is delicious on its own, but a few simple additions can make it even more special.
- Vanilla ice cream: A scoop alongside a warm slice creates a classic dessert combination.
- Freshly whipped cream: Adds a light, creamy finish.
- Warm caramel sauce: Brings extra sweetness and a rich caramel flavor.
- Coffee or tea: Perfect for an afternoon treat.
- Hot apple cider: Complements the cinnamon and apple flavors.
- A sprinkle of cinnamon: Adds a final touch of warmth.
- A holiday dessert platter: Serve it alongside pumpkin pie, pecan pie, or other seasonal favorites.
For the best contrast, serve a slightly warm slice with a scoop of cold vanilla ice cream.
Variations and Easy Swaps
One of the best things about apple slab pie is how easy it is to customize. Try these variations when you want something a little different.
Apple Crumble Slab Pie
If you love a crunchy topping, replace the top pastry with a buttery crumble.
Combine:
- ¾ cup all-purpose flour
- ½ cup brown sugar
- ½ teaspoon ground cinnamon
- 6 tablespoons cold butter
Work the butter into the dry ingredients until the mixture forms coarse crumbs. Sprinkle the crumble evenly over the apple filling and bake until the topping is golden and the apples are tender.
Caramel Apple Slab Pie
For an extra-indulgent dessert, drizzle caramel sauce over the cooled pie just before serving.
You can also add a small amount of caramel between the apples and top crust, but avoid adding too much liquid, as it may make the filling overly wet.
Apple Pecan Slab Pie
Add ½ cup chopped pecans to the apple filling for extra crunch and a rich, nutty flavor.
Lightly toasting the pecans before adding them can bring out their natural flavor.
Apple Cranberry Slab Pie
Mix ½–¾ cup dried cranberries into the apple filling for a sweet-and-tart variation.
This version is especially lovely during Thanksgiving and the Christmas season.
Easy Glazed Apple Slab Pie
For a bakery-style finish, prepare a simple glaze using:
- ½ cup powdered sugar
- 1–2 teaspoons milk
Whisk until smooth, then drizzle over the completely cooled pie. Allow the glaze to set before cutting into squares.
Add Extra Warm Spices
For a more aromatic filling, experiment with small amounts of additional spices. A little extra cinnamon or a pinch of nutmeg can enhance the traditional apple pie flavor without overpowering the fruit.
Pro Tips for the Best Apple Slab Pie
Keep these tips in mind to help your pie turn out beautifully every time.
- Choose firm baking apples. Granny Smith, Honeycrisp, and Braeburn are good choices for a filling that holds its texture.
- Slice the apples evenly. Consistent slices cook at a similar rate.
- Keep the pastry cold. Warm dough is harder to handle and may produce a less flaky crust.
- Avoid adding excess liquid. Too much apple juice can make the bottom crust soggy.
- Don’t skip the steam vents. Small openings allow moisture to escape during baking.
- Seal the crust edges well. This helps keep the filling inside the pastry.
- Watch the crust as it bakes. Cover overly browned areas loosely with foil if necessary.
- Check that the apples are tender. A golden crust alone doesn’t guarantee the filling is ready.
- Allow enough cooling time. The filling needs time to thicken before slicing.
- Use a sharp knife. Clean cuts help create attractive squares for serving.
Frequently Asked Questions
Can I make apple slab pie ahead of time?
Yes! You can bake the pie a day before serving. Allow it to cool completely, cover it, and refrigerate it. Warm individual slices in the oven before serving if you prefer a freshly baked texture.
What are the best apples for apple slab pie?
Granny Smith, Honeycrisp, and Braeburn are excellent choices because they hold their shape during baking.
A combination of tart and sweet apples creates a balanced filling with plenty of flavor.
Why is my apple slab pie watery?
Excess moisture can come from particularly juicy apples, too much liquid in the filling, or insufficient baking and cooling.
Coating the apples with flour helps thicken the juices, while allowing the pie to cool completely gives the filling time to set.
Can I use store-bought pie crust?
Absolutely! Refrigerated pie dough is a convenient shortcut when you’re short on time.
Because this recipe uses a large rectangular pan, check the package size carefully. You may need several packages to cover both the bottom and top of the pie.
How do I know when apple slab pie is done?
Look for a golden-brown crust, bubbling filling, and tender apples. You can test the apples by inserting a small knife through one of the steam vents.
If the crust browns too quickly before the apples are tender, loosely cover the browned areas with foil and continue baking.
Can I use a different-sized baking pan?
Yes, but the thickness of the pie will change, which may affect the baking time. Make sure the pan has a rim high enough to contain the filling and juices.
Can I make apple slab pie without the top crust?
Yes. Use the apple filling with a crumble topping instead. This creates a delicious apple crumble slab pie with a crunchy, buttery finish.
Can I freeze apple slab pie?
Yes. Allow the pie to cool completely, then wrap individual slices or portions tightly and place them in a freezer-safe container.
For the best quality, use within approximately three months. Thaw in the refrigerator before reheating.
How should I reheat leftover apple slab pie?
Place a slice in an oven preheated to 300–325°F (150–165°C) until warmed through. The oven helps the pastry regain some crispness.
You can also warm individual servings in the microwave, although the crust may become softer.
Storage and Reheating
Proper storage helps preserve the flavor and texture of your homemade apple slab pie.
Room Temperature
Because the pie contains moist fruit filling, refrigerating leftovers is the safer choice for extended storage. Avoid leaving the pie at room temperature for more than two hours.
Refrigerator
- Allow the pie to cool before covering it.
- Store the covered pan or transfer individual slices to an airtight container.
- Refrigerate for up to four days for the best quality.
Freezer
- Wrap individual slices or larger portions tightly.
- Place them in a freezer-safe container to protect against freezer burn.
- Freeze for up to three months for the best quality.
- Thaw in the refrigerator before reheating.
Reheating Tips
Oven: Warm slices at 300–325°F (150–165°C) until heated through. This is the best option for maintaining a crispier crust.
Microwave: Heat individual portions in short intervals until warm. The pastry may be softer than when reheated in the oven.
Make-Ahead Tips
If you’re preparing apple slab pie for a gathering, a little planning can make the process easier.
- Prepare the dough early. Make the pastry ahead and refrigerate it until you’re ready to roll it out.
- Plan your baking schedule. Bake the pie early enough to allow the filling to cool and set.
- Prepare the dessert a day ahead. Refrigerate the cooled pie, covered, until serving time.
- Add the glaze later. If you’re using a powdered sugar glaze, drizzle it over the cooled pie before serving.
- Prepare your toppings. Have ice cream, whipped cream, or caramel sauce ready when it’s time to serve.
The Beauty of a Classic Homemade Apple Pie
There’s something special about a homemade apple pie fresh from the oven. The aroma of cinnamon, the sweetness of tender apples, and the richness of buttery pastry create a dessert that feels right at home at any gathering.
Apple slab pie takes everything people love about traditional apple pie and makes it easier to share. Its rectangular shape is practical for serving a crowd, while the cinnamon-spiced filling and flaky crust keep every bite comforting and delicious.
Whether you’re baking for a holiday celebration, a family dinner, a bake sale, or simply because you’re craving a homemade dessert, this recipe is a wonderful choice.
Make the pastry from scratch when you have time, or use refrigerated pie dough for a quicker version. Add pecans, cranberries, caramel, or a sweet glaze to give it your own special touch.
Once the pie has cooled and been cut into squares, it’s ready to bring a little homemade sweetness to the table.
Final Recipe Summary
- Recipe: Homemade Apple Slab Pie
- Difficulty: Moderate
- Prep time: Approximately 30–45 minutes, plus chilling time
- Bake time: 40–55 minutes
- Cooling time: 1½–2 hours
- Total time: Approximately 2½–3½ hours, plus any additional chilling time
- Yield: 12–15 servings
- Oven temperature: 375°F (190°C)
- Pan size: 10-by-15-inch rimmed baking sheet
- Main ingredients: Apples, flour, butter, sugar, cinnamon, and pie pastry
- Storage: Refrigerate leftovers for up to four days or freeze for up to three months
- Best for: Family gatherings, holiday dinners, potlucks, bake sales, and weekend desserts
Enjoy every delicious square of this homemade apple slab pie!