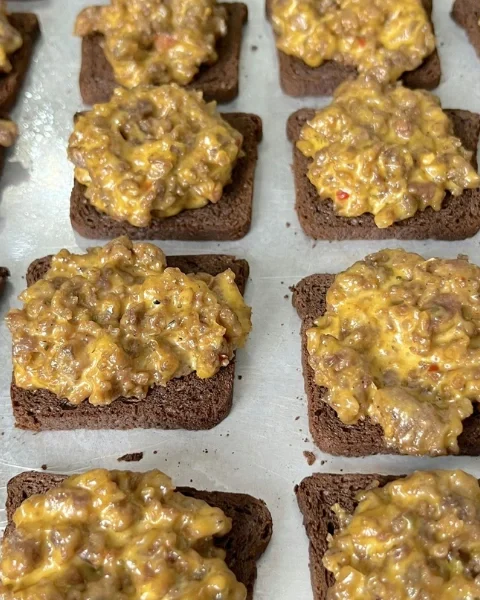
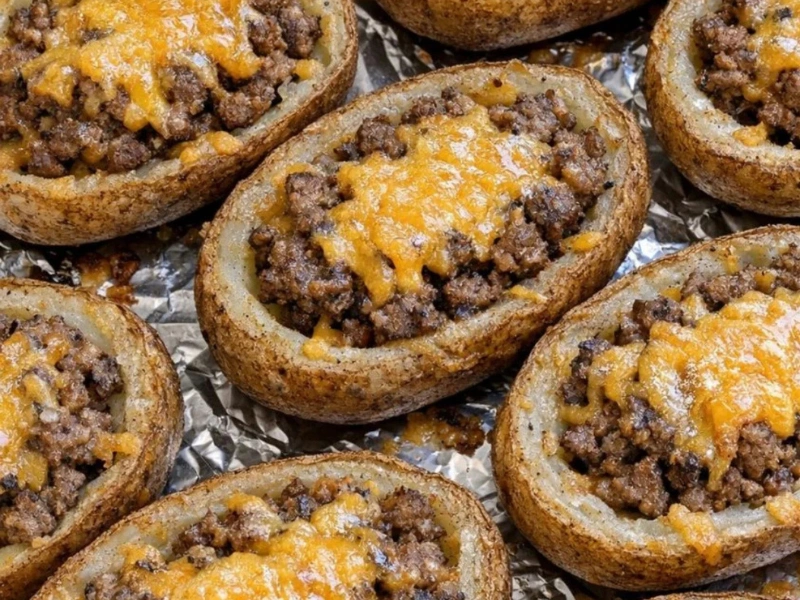
Crispy, Cheesy Potato Skins Loaded with Savory Ground Beef
When you need a crowd-pleasing appetizer that delivers big flavor without complicated preparation, these Beef and Cheddar Potato Skins are the answer. Crispy baked potato shells are filled with seasoned ground beef, topped with sharp cheddar cheese, and baked again until the cheese is melted and golden.
Unlike traditional fried appetizers, these potato skins are made entirely in the oven, making them easier to prepare and less messy to clean up. They’re perfect for game-day spreads, family gatherings, potlucks, or even a casual weeknight snack.
The combination of crispy potato skins, flavorful beef, and gooey cheddar creates a satisfying bite that disappears fast whenever it’s served.
Why You’ll Love This Recipe
- Made with only 4 main ingredients
- No deep frying required
- Crispy outside with a hearty filling
- Great for parties and entertaining
- Uses simple pantry staples
- Easy to customize with your favorite toppings
- Perfect for leftover cooked ground beef
Oven-Baked Beef Potato Skins
Prep Time: 15 minutes
Cook Time: 55–75 minutes
Total Time: About 1½ hours
Yield: 12 potato skin halves
Ingredients
- 6 medium russet potatoes, scrubbed clean
- 1 pound ground beef (80–90% lean)
- 2 cups shredded sharp cheddar cheese
- 1½ teaspoons kosher salt, divided
Instructions
1. Heat the Oven
Preheat the oven to 400°F (200°C).
Line a large baking sheet with foil or parchment paper for easier cleanup.
2. Bake the Potatoes
Using a fork, poke several holes in each potato to allow steam to escape while baking.
Place the potatoes directly on the oven rack or on the prepared baking sheet.
Bake for 45–60 minutes, or until the potatoes are tender and the skins feel crisp.
3. Brown the Ground Beef
While the potatoes cook, place the ground beef in a skillet over medium-high heat.
Cook, breaking the meat apart as it browns, until fully cooked and no pink remains.
Drain excess fat and season with 1 teaspoon of kosher salt.
Set aside.
4. Hollow Out the Potatoes
Remove the potatoes from the oven and allow them to cool for 10–15 minutes.
Leave the oven on.
Cut each potato in half lengthwise.
Using a spoon, carefully scoop out most of the flesh, leaving about ¼ inch attached to the skin to maintain structure.
Reserve the potato flesh for another recipe.
5. Fill the Potato Shells
Arrange the potato skins on the baking sheet with the cut side facing up.
Sprinkle the remaining salt inside the shells.
Evenly divide the cooked ground beef among the potato halves.
Top each one generously with shredded cheddar cheese.
6. Bake Again
Return the filled potato skins to the oven.
Bake for 10–15 minutes, or until the cheese is fully melted and beginning to brown around the edges.
7. Serve
Allow the potato skins to cool for about 5 minutes before serving.
Serve warm with your favorite toppings and dipping sauces.
Helpful Tips
Choose Russet Potatoes
Russets have thick skins that crisp beautifully in the oven and sturdy shells that hold fillings well.
Don’t Over-Scoop
Leaving a thin layer of potato attached to the skin prevents the shells from collapsing during the second bake.
Save the Potato Filling
The scooped-out potato can be used for mashed potatoes, soups, potato pancakes, or casseroles.
Use Sharp Cheddar
Sharp cheddar delivers the best flavor and creates that classic cheesy potato skin experience.
Add Extra Toppings
After baking, try adding:
- Sour cream
- Chopped chives
- Green onions
- Crumbled bacon
- Jalapeños
- Diced tomatoes
Easy Variations
Bacon and Cheese Potato Skins
Replace the beef with crispy crumbled bacon and finish with sour cream and chives.
Buffalo Chicken Potato Skins
Use shredded chicken tossed in buffalo sauce and top with cheddar and blue cheese crumbles.
BBQ Pulled Pork Version
Swap the beef for pulled pork and add a drizzle of barbecue sauce.
Taco Potato Skins
Season the beef with taco seasoning and serve with salsa, sour cream, and black olives.
Jalapeño Popper Style
Fill the shells with cream cheese, cheddar, and diced jalapeños for a spicy twist.
Vegetarian Option
Replace the beef with black beans, sautéed mushrooms, peppers, or a combination of vegetables.
Serving Ideas
These loaded potato skins pair perfectly with:
- Ranch dressing
- Sour cream
- Blue cheese dressing
- Hot sauce
- Pico de gallo
- Guacamole
- Salsa
For a complete party spread, serve them alongside:
- Chicken wings
- Nachos
- Loaded fries
- Vegetable trays
- Chips and dip
Storage and Reheating
Refrigerate
Store leftovers in an airtight container for up to 5 days.
Reheat
For the crispiest results, reheat in a 400°F oven for 8–10 minutes.
Avoid microwaving if possible, as it softens the potato skins.
Freeze
The assembled potato skins can be frozen for up to 3 months.
Freeze them on a baking sheet first, then transfer to freezer-safe bags.
Bake directly from frozen at 400°F for 15–20 minutes.
Why This Recipe Works
The secret to great potato skins is the two-stage baking process.
The first bake cooks the potatoes until tender while creating crisp, sturdy skins. After they’re hollowed out and filled, a second trip to the oven melts the cheese and crisps the edges even further.
The seasoned ground beef adds hearty flavor and protein, while the cheddar creates a rich, gooey topping that ties everything together.
With only a handful of ingredients and straightforward preparation, this recipe proves that impressive appetizers don’t have to be complicated.
Final Thoughts
These Beef and Cheddar Potato Skins combine everything people love in a party appetizer—crispy potatoes, savory beef, and melted cheese. They’re easy to make, endlessly customizable, and guaranteed to be one of the first dishes to disappear from the table.
Whether you’re hosting a football party, bringing a dish to a potluck, or simply looking for a fun family snack, these loaded potato skins are always a winning choice.