Weeds have a way of showing up exactly where you don’t want them—pushing through cracks, crowding garden beds, and returning just when you think you’ve cleared them out. Many people end up stuck between constant pulling and relying on harsh chemical sprays that raise concerns about safety, cost, and environmental impact.
The good news is that there’s a simpler, more mindful approach. With a few common household ingredients and the right technique, you can create a homemade weed solution that’s effective for small areas and easier on your surroundings. It’s not a miracle cure—but used correctly, it can make weed control much more manageable.
Why Try a DIY Weed Solution?
Store-bought herbicides can work well, but they often come with downsides:
- Environmental concerns: Some chemicals can linger in soil or wash into nearby water sources
- Expense: Regular use can become costly over time
- Safety worries: Residue may affect pets, kids, or beneficial insects
A homemade mixture gives you more control over what you’re using and where you apply it. It’s especially useful for patios, walkways, and driveway cracks rather than large garden areas.
That said, “natural” doesn’t always mean harmless—so using it carefully is key.
What You’ll Need
This simple formula relies on three basic ingredients:
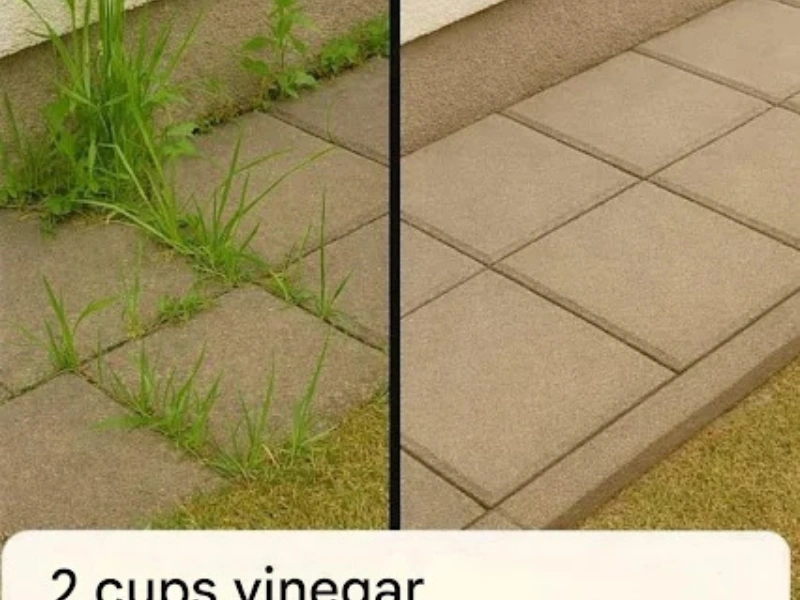
- White vinegar (1 gallon, 5% acidity or higher): Helps dry out plant tissue
- Table salt (1 cup): Pulls moisture from weeds and disrupts growth
- Liquid dish soap (1 tablespoon): Helps the mixture stick to leaves
Optional additions:
- A few drops of citrus essential oil for added strength and scent
- Boiling water for pre-treating stubborn weeds in cracks
💡 If you’re treating soil where you plan to grow plants later, skip the salt—it can make the soil less suitable for future growth.
How to Make and Use It
1. Prepare Safely
Wear gloves and avoid splashing the mixture into your eyes. Cover nearby plants you want to keep, since this solution can harm anything it touches.
2. Mix the Ingredients
Combine vinegar, salt (if using), and dish soap in a bucket or sprayer. Stir gently until the salt dissolves.
3. Apply at the Right Time
For best results:
- Choose a sunny, dry day
- Avoid windy conditions
- Make sure no rain is expected for at least 24 hours
Spray directly onto weed leaves until lightly coated.
4. Let It Work
Most weeds will start to wilt within a day or two. Tougher plants may need another application.
5. Repeat if Needed
Since this method works on contact, you may need to reapply every week or two for persistent weeds.
Tips for Better Results
- Be precise: Spray only the weeds, not surrounding plants
- Don’t overdo it: Too much salt can damage soil long-term
- Start small: Test on a small area first
- Combine methods: Pull large weeds first, then treat what remains
Variations You Can Try
- Garden-safe version: Use vinegar + soap only (no salt)
- Extra strength: Add a few drops of citrus oil
- Crack treatment: Pour boiling water first, then apply the mixture
Common Questions
Will it harm grass or flowers?
Yes—this solution is non-selective and can damage any plant it touches.
How fast does it work?
You’ll usually see results within 24–48 hours for smaller weeds.
Is it safe around pets and kids?
Once dry, the area is generally safe—but keep them away during application.
Can I use it on my lawn?
Not recommended. It will kill grass as well as weeds.
Why didn’t it work?
Mature weeds, cloudy weather, or light application can reduce effectiveness. Try again under better conditions.
A More Balanced Approach to Weeds
There’s no perfect, one-step solution for weed control. Even the best methods require a bit of patience and consistency. Often, prevention—like mulching and maintaining healthy soil—goes a long way.
Still, when weeds do show up, this simple homemade mixture can be a practical, low-cost option for targeted use. It’s all about using the right tool in the right place.
If you give it a try, experiment with what works best for your space—and adjust as needed. Gardening is always a learning process, and every small improvement adds up. 🌱